Total Pageviews

Showing posts with label plumbing. Show all posts

Thursday, August 1, 2013

Drip irrigation air

The air is supplied by an LA80 Medo linear piston pump. Distributed by 1 inch to 1/2 inch rigid pvc. 

The drip kit, with all the parts, a 5/32 drill is used to make the valve holes in the 1/2 poly line. 


Zip tie the ends closed 

Drill a hole per line. 

Insert the valves. 

Air stone and weight. 

Inline valve for easy fine adjustments. 

A typical assembly with short airline for this example. Valve can be inserted directly to 1/2 poly line. 

I installed two per tub, here a tub of eggs is incubating. 

Tuesday, July 23, 2013

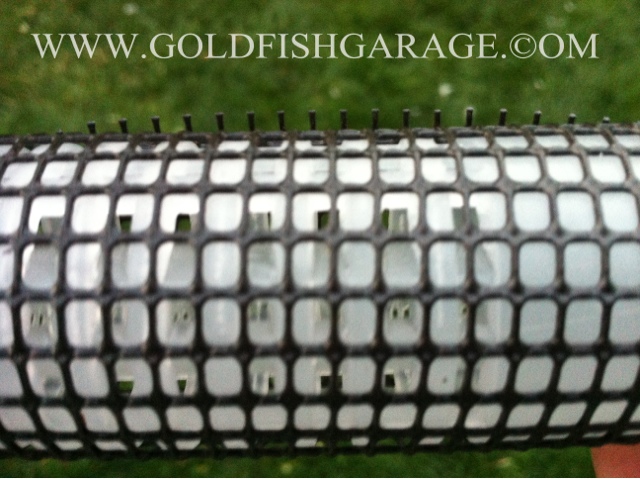
Mesh Drains: 1 and 1.5 inch


Tuesday, July 9, 2013

Nursery System


Two 8 foot fiberglass troughs, a 50 gallon rubbermaid stock tank, an Aquaultraviolet Ultima 1000 bead filter and some sand.


Thursday, November 22, 2012

Rubbermaid Stock Tank Adaptor

This is how I plumb rubbermaid stock tanks. The bulkhead is 1.25 female NPT pipe thread on the outside and the useless back side of these threads in the inside.

The solution is to take a 1.25 male adapter and use a dremel and a sanding bit to bore out it to the point where a one inch pipe will pass through. Glue the one inch pipe into place with a couple inches inside the tank to attach the stand pipe to. It can the flush on the outside and plumb te drain to the 1.25 male adapter or have it sticking out as shown for 1 inch plumbing. All stand pipe is simple friction fit.

Friday, August 24, 2012

External Stand Pipe from Salvaged part

This is on the 500 gallon fiberglass pond. With the gate valve closed the water takes the higher route so te bottom plumbed tank can't drain completely. Open the valve and tank will drain.

Thursday, June 14, 2012

DIY Ultraviolet Sterilizer for Japanese Import system

I am building this unit into the supply manifold for the new system.  It will have two 65 watt UV bulbs and run on emperor aquatic ballasts.

It will be very similar in design to this unit but instead of a U shape vessel it will be a more linear design.  http://goldfishgarage.blogspot.com/2011/02/diy-130-watts-2-x-65-watts-uv.html

From paper to reality

Ready to install


Installed and ready to Zap the water

Polycarbonate sleeve support

The dry end

Sleeve support, spacer and fernco boot

The End

Monday, April 2, 2012

Freak Snow Storm Damages Hatchery Tank Filtration

On March 23 we got our first and last snow of the year. http://www.kval.com/news/local/A-truly-historic-spring-snowstorm-for-Eugene--143698986.html
No one was really expecting the snow but 7.5 inches fell at the airport and closer to 10 here in the hills. A Douglas Fir limb landed on the hatchery tank system's zapp pure uv breaking the clear union threads that attach and draining the system. This caused two tanks to completely drain. It was last years Bristol Shubunkin (Parker strain) and the late summer Matuyama x Itoh that had been raised and over wintered out side. They were high and dry for possible a day. Good thing they were cold as most revived but are now succumbing to their injuries. The Ranchu were moved inside with the bristols soon to follow.

Fortunately the system was out together with ferncos. A few twists of a nut driver and a scrap price of two ich pipe the zapp pure was bypassed.

Tuesday, October 4, 2011

Hatchery Tank Standpipe


The tanks have a built in drain nipple to receive the primary and secondary standpipes.  This system was old and set up for flow through so leaks were to likely to be used in recirc.  From the bottom a 4"x2" Fernco was attached to the fiberglass nipple.  A two inch pipe 8 inches long with a couple glued to the internal side was passed through the fernco.  

The foam expanded and made the standpipe couple fitting very sturdy.  The small sump around the couple is to receive the original aluminum secondary standpipe that allows for bottom collection.  The couple was set to be even with the bottom of the tank and Great Stuff expanding foam was used to fill the space between  the 2" pipe and the inside of the fiberglass nipple.  The couple even with the floor is the new receptacle for the 2 inch primary standpipe.

The primary standpipe is 28 inches tall with the top 3 inches slotted to retain the fish to a depth of 24 inches.

The secondary standpipe is aluminum and in need of a new powder coating.  This stand pipe is installed for bottom collection of water and solids for heavy loaded tanks.

A close up of the secondary standpipe base showing the intake holes even with the floor of the tank.  The water will be flown tangentially creating a circular flow bringing the solids to the center for better solids capture at lower flows.

See the whole project here.