Total Pageviews

Showing posts with label Hatchery Tank. Show all posts

Tuesday, July 9, 2013

Nursery System


Two 8 foot fiberglass troughs, a 50 gallon rubbermaid stock tank, an Aquaultraviolet Ultima 1000 bead filter and some sand.


Thursday, November 3, 2011

Hatchery Tanks from the Shed Roof

Trimming trees from the shed roof. A new angle on the newly install hatchery tanks.

Sunday, October 23, 2011

Aquabead 6 cubic foot installation part 4 UV

Cutting a glued fitting off a proprietary UV fitting.  Risky and rarely works.

Sometimes things just work out.

Replacing the bulb in the Zapp Pure Stainless UV.

A close up for future reference.

Love it when things line up.  Just one more fitting.

Aquabead 6 cubic foot installation part 3

1/4 hp Wave pump with integrated leaf trap.

Fitting the system back together.  It was a year ago that I went and got this filter.  Thankfully I took a video of the system before I cut it up.

Reusing pipe can be cost effective but at times very frustrating.

Plumbing the midnight oil.

How does it go?

Aquabead 6 cubic foot installation part 2

The equipment pad.  The system was originally on two of these and I'm fitting in onto one.

The multiport valve.

Loctite silicone lubricant for the o-rings.

Multiport valve O-ring.

Mounted.

Aquabead 6 cubic foot installation part 1

Removed the top to check the strainers and beads.

6 cubic feet of beads.  Each cubic foot is rated for 50 pounds of fish.

A scoop of beads.

About to wrestle it into place between the tank and the shed.

A look at the sludge valve.

Thursday, October 13, 2011

Itoh and Hattori (Hater) 10

Itoh and Hattori (Hater) 2010.  Spent the summer in a 4x4 fiberglass tub.  Moved to a hatchery tank for the winter.  The water is currently draining from the tank.

Sunday, October 9, 2011

Hatchery Tanks Completed

Completed Hatchery Tank

2" x 3/4" Recirc Supply.  1/2" x 1/8th" Air.
Ready for fish.

Supply Valve.

2" Primary Standpipe.

6" secondary standpipe.  Itoh and Hattori (Hater) '10.

The drain infrastructure.


Tuesday, October 4, 2011

Hatchery Tank Filling

Wow, a one week turnaround. Picked them up last Monday and am filling the first one a week later.

Hatchery Tank Standpipe


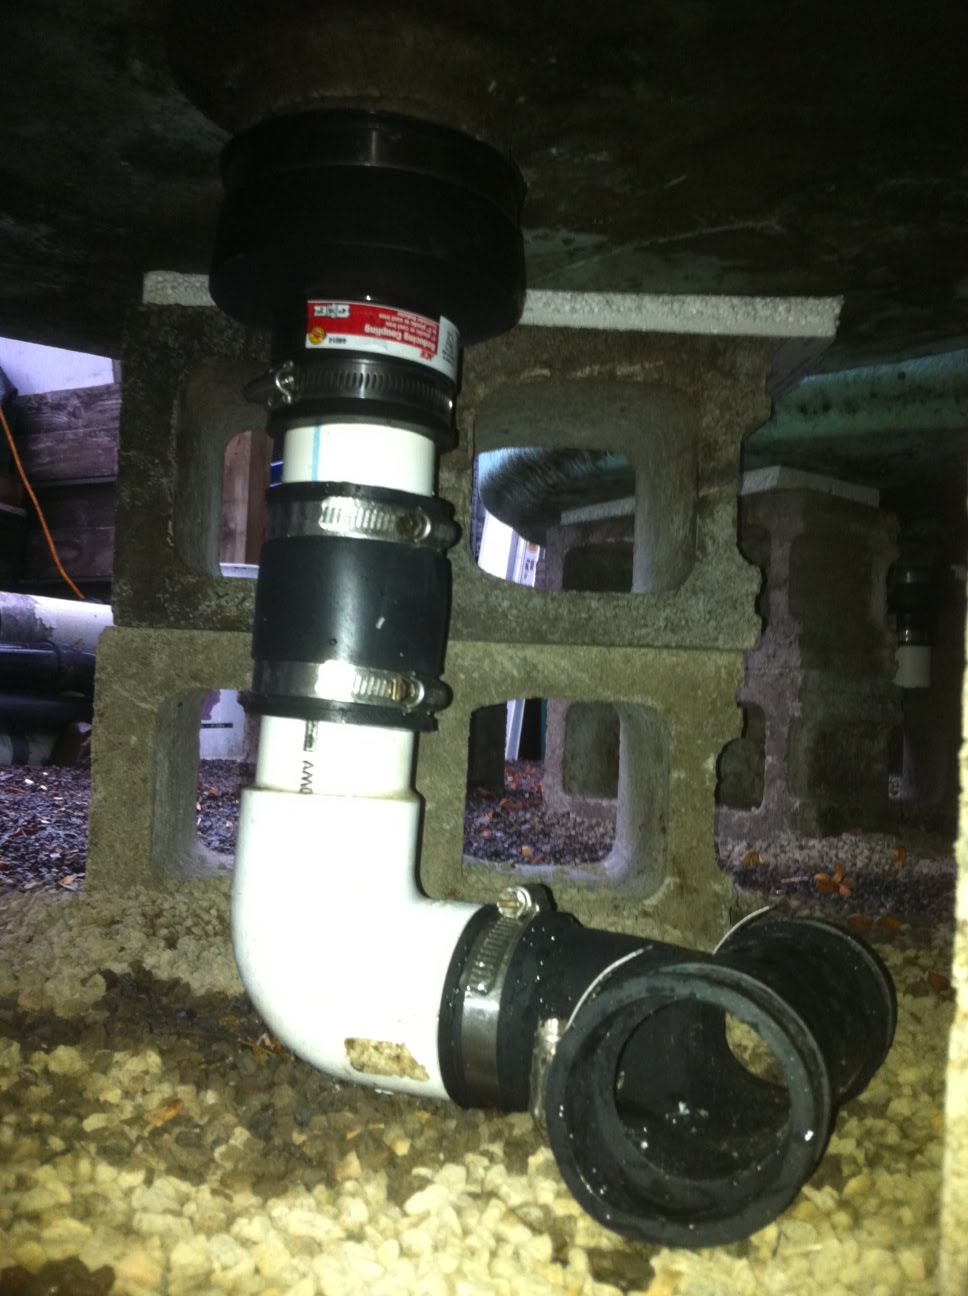
The tanks have a built in drain nipple to receive the primary and secondary standpipes.  This system was old and set up for flow through so leaks were to likely to be used in recirc.  From the bottom a 4"x2" Fernco was attached to the fiberglass nipple.  A two inch pipe 8 inches long with a couple glued to the internal side was passed through the fernco.  

The foam expanded and made the standpipe couple fitting very sturdy.  The small sump around the couple is to receive the original aluminum secondary standpipe that allows for bottom collection.  The couple was set to be even with the bottom of the tank and Great Stuff expanding foam was used to fill the space between  the 2" pipe and the inside of the fiberglass nipple.  The couple even with the floor is the new receptacle for the 2 inch primary standpipe.

The primary standpipe is 28 inches tall with the top 3 inches slotted to retain the fish to a depth of 24 inches.

The secondary standpipe is aluminum and in need of a new powder coating.  This stand pipe is installed for bottom collection of water and solids for heavy loaded tanks.

A close up of the secondary standpipe base showing the intake holes even with the floor of the tank.  The water will be flown tangentially creating a circular flow bringing the solids to the center for better solids capture at lower flows.

See the whole project here.


Hatchery Tank Drains

These are subcomponents of the drain manifold for the hatchery tanks. Rigid PVC and flexible Fernco tees were alternated for ease of installation. Appropriate lengths of pipe will be glued into the PVC and attached to the ferncos. The ferncos add expense but save in the long run for ease of repair and reconfiguration.

The 2" couple is slid up to attach to the bottom of the tank. The fernco tee attaches the tank to the main drain line back to filter.

Same set up with a PVC tee that lengths of pipe were glued into to create the drain line.

4"x2" Fernco attached to the fiberglass nipple on the bottom of the tank, 2" pvc standpipe projecting through the bottom, with a 2" Fernco couple attaching to the elbow and Fernco Tee.

A look at the PVC version. The PVC and Fernco tees are alternated every other tank.